27 October 2023
Leaks have a knack for appearing when you least expect them, often in the midst of heavy rain or under conditions that make repairs challenging.
Leaks have a knack for appearing when you least expect them, often in the midst of heavy rain or under conditions that make repairs challenging.
Whether it's a leaky roof, a crack in your water tank, or a troublesome gap in your caravan, these unwanted leaks can wreak havoc on your property, causing all kinds of damage and costly repairs.
At times like these, what you need is a reliable, fast-acting, and weatherproof solution that can provide immediate relief while safeguarding your investments.
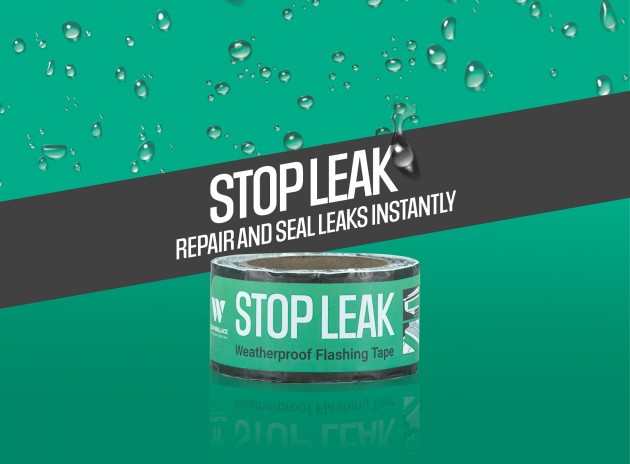
Stop Leak tape is a versatile all-purpose weatherproof repair tape for sealing leaks and preventing further damage, ensuring your home, vehicles, and structures stay dry and secure.
Ideally suited for repairing:
Roofing: Repair those pesky leaks in your roof, ensuring your home stays dry and comfortable.
Guttering: Keep your gutters in top shape with Stop Leak Tape, preventing water damage to your property.
Downpipe: Seal any cracks or leaks in downpipes to maintain efficient water drainage.
Water Tank Tops: Ensure your water tanks are watertight, preserving your water supply.
Skylights: Seal joints around skylights to prevent any water from sneaking in during a rain shower.
Doors and Adjoining Building Surfaces: Use Stop Leak Tape to weatherproof your doors and the areas where different building surfaces meet.
Seams in Caravans, Trucks, Sheds, and More: This tape is versatile enough to handle seam sealing on various vehicles and structures.
Applying Stop Leak Tape for New Zealand Repairs
When it comes to applying Stop Leak Tape, it's essential to follow these steps to ensure a secure and effective seal, especially in New Zealand's varying weather conditions:
- Measure and Cut: Start by measuring the required length of Stop leak Tape. For cutting, we recommend using a razor blade for precise results.
- Surface Preparation: Ensure that the surface you're sealing is clean and free of any dirt, oil, or contaminants.
- Remove Backing: Peel off the transparent backing from the tape.
- Apply Firm Pressure: Press the Stop leak Tape firmly onto the surface, making sure to eliminate any air pockets.
Using Stop leak Tape in Wet or Underwater Conditions
When applying Stop leak Tape in wet situations, follow these steps for the best results:
- Cutting and Preparation: Keep the liner on and cut the Stop Leak Tape into a patch larger than the area requiring repair. You can round the corners of the patch to prevent them from lifting.
- Apply Firmly: Remove the liner and firmly apply Stop Leak Tape over the area that needs sealing. Once applied, Stop Leak Tape cannot be repositioned. For the best results, apply the tape to both sides of the repair.
- Pressing Techniques: Press the tape firmly using your fingers, a squeegee, a credit card, a roller, or any flat object. Start from the center and work towards the edges.
- Eliminate Air Pockets: Ensure that there are no water pockets, creases, or folds left in the tape, as these areas can potentially allow water to seep through and cause leaks.
- Bonding Time: Continue pressing firmly for at least one minute, or longer if needed, to allow Stop leak Tape's adhesive to bond completely with the surface.
Please be aware that Stop leak Tape may not adhere well to certain surfaces, such as siliconized or water-repellent materials, and its removal might cause damage to the surface. It is not intended for high-pressure applications or permanent repairs.
Additional Tips
Use a razor blade instead of scissors for cutting Stop leak Tape, as the thick adhesive can affect scissor performance.
Ensure that you've removed the protective film and press down firmly for the best results. Tools like a squeegee, roller, or a flat item like a ruler can help you firmly secure the tape and eliminate air pockets.
Stop leak Tape will adhere immediately, but its bonding strength increases over time. Allow it to sit for 24 hours, if possible. Once fully bonded, it cannot be repositioned.
For better adhesion in cold weather or porous surfaces like concrete, you can use a hair dryer on the back of Stop leak Tape to soften the butyl rubber.
Stop Leak Tape is suitable for most surfaces, including acrylic, metal, steel, copper, aluminum, wood, ceramic, porcelain, tile, glass, rubber, fiberglass, stucco, plaster, stone, cement, concrete, drywall, EPDM roofs, some plastics, fabrics, vinyl, and more.
Note that Stop Leak Tape may not work well on siliconized surfaces, greasy surfaces, water-repellent surfaces, or surfaces with harsh chemicals present, such as acids or mineral spirits.
Remember that Stop leak Tape is recommended for normal hydrostatic pressure and is not intended to withstand high-pressure situations like pressurized pipes or engine machinery.
For instant waterproofing repairs,try Stop Leak all purpose weatherproof repair tape.